


Holiday Passive Programs

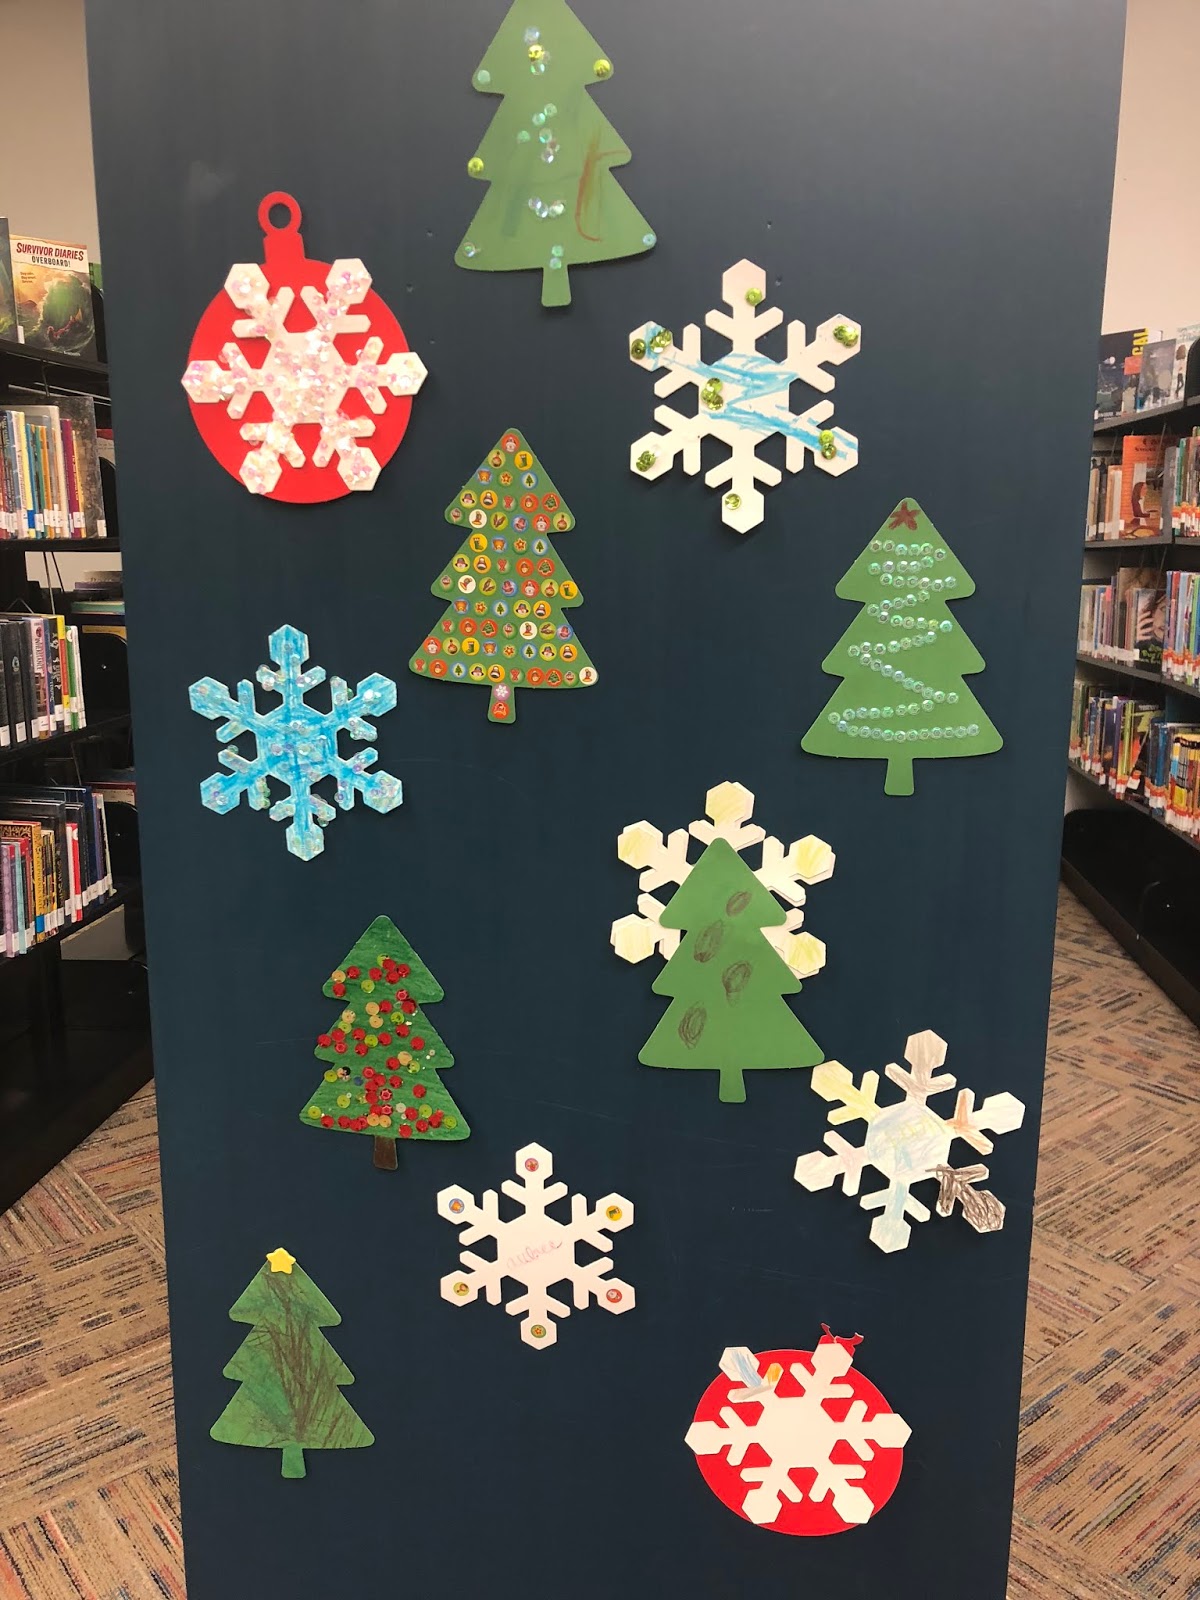
Towards the end of November, we had an all day set-up of department decorating crafts. The concept was similar to come&go crafts, but instead of taking your craft home, you'd leave it with us to hang up in the room!
There were 4 different crafts to do: Ornament coloring (as seen pictured above), a paper chain, snowflake decorating and Christmas tree ornament crafts from Oriental Trading. Here's a quick breakdown of what we had...

Exactly what you think it'd be.
Beforehand, I had drawn and cut out ornaments from poster board. All we did for this craft was put them out on the table and provide crayons for kids to color them.
Once completed, ornaments received a string of yarn and they were hung on the end caps of our non-fiction shelves!
(I did google different ornament shapes though so they weren't all the same)
.... There's probably a better way to describe it than that ↑
In retrospect, this is very similar to the craft listed above, but for this one we pulled out stickers. And sequins. So many sequins.
This activity got the most attention. We had bought equal amounts of the different shapes from Hobby Lobby and the snowflakes were by far the most popular option.
Once completed, these were hung on our fiction shelves.

Tree Ornaments
The past few years, instead of decorating the tree with our YS ornaments, we've let the kids decorate it themselves.
A good bit of the above craft decorated our tree too.
Little story: This year we bought several different sets of foam ornaments from Oriental Trading, at different times throughout the year. When we pulled them out for our craft day we realized that all our different sets we had bought were red, white & blue. No idea how that happened, but our tree was very patriotic.

Can you see the paper chain behind Mr. Grinch? Yea? That's the only picture of this activity I have!!
For the paper chain, our question was "What is your favorite thing about the holiday season?" (something along those lines...)
Participants wrote their answers on the slip of paper to make a link for our chain.
Paper chains are the best! Easy set-up, easy up-keep and plus, they really brighten up a room.
Christmas Color By Number Worksheet

This was inspired by several other color-by-number worksheets I found by could not enlarge enough without getting blurry. It's either a hidden picture of Santa Clause or a reindeer face - it's been a good minute since I made this worksheet, so I don't quite remember! (Let me know in the comments what the picture is of 😊)
Either way though, feel free to use this. Here's a PDF file ꜜꜜꜜ It'll need to be printed front an back if possible. Christmas Color By Number/ Math Sheet
💚💛💜
I Survived The Shark Attacks of 1916
I Survived The Shark Attacks of 1916 by Lauren Tarshis
New Year, Same Book Series.
For 2019 we decided to pick up and continue our I Survived book club and started the year off with a doozy!

Discussion
Sometimes book dialogue comes naturally to the group and other times it doesn't. To help initiate and progress conversations, each meeting begins with discussing our favorite parts of the story. If every kid shares a scene from the book then right off the bat everyone is interacting and contributing to book club!One of my favorite bits from I Survived The Shark Attacks of 1916 was about Hermann Oelrich, the rich shipping owner who is mentioned by Uncle Jerry. In this story, while out on a yacht with friends, Hermann jumps into shark infested waters and swam around to prove a point that sharks wouldn't attack a human. He yelled, splashed and caused a huge commotion in the water to attract the sharks but ultimately just scared them away. He offered a $500 ($12,000 in today's money) to anyone who could give a proven example of a shark attack on the Eastern Coast.
The group was very excited to hear that this was a true story and jump started our conversation to other topic points.
Of the 5 victims (Charles Vansant, Charles Buder, Lester Stilwell, Stanley Fisher and Joseph Dunn), I was only able to find 3 pictures. These were printed off and used in our discussion to help connect the story to real faces. Most of our discussion was talking about each attack individually.
Shark Activity
 This game was inspired by Battleship.The objective of this game to blast (remove) your opponents sharks out of the water (table) first. First team to do this, wins. This is accomplished by tossing in dynamite (red bean-bags) into the water towards your opponents sharks.
Set up:
1.Taped off grid on a spare table with painters tape.
- This included 4 squares that were marked off separately with tape.
- These were made with felt and rice. Edges were hand sewn together.
- >These blockers just make the game a little harder 😄

- Divide into 2 teams and place sharks strategically on the board
- One player at a time, use the bean bags (our were hearts and angry birds from another program), knock your opponents shark out of the water.
- First team to clear the board of the opposing sharks wins.
The 4 squares marked off separately with tape cannot be used to place sharks in when setting the board.
If a shark is knocked into this square by a team member, the opposing team is given the opportunity to resurrect one of their own sharks, moving one shark from the floor to back into gameplay.

This game was so much fun! In 1916, after Joseph Dunn was nearly killed by the shark, Matawan Creek was dynamited. The story for this game to pretend like the red bean bags were dynamite and blow the opposing teams sharks out of the water.
The group went through the game several times before deciding that they wanted to play tournament style, which we did!
The cardboard blockers lasted until about the third game but they provided the perfect challenge to make this game great.


💚💛💜
Banned Books Week 2018

Inspiration for this idea came from a picture off Pinterest of library books in a cage. The librarian who had done it had huge metal chains and locks around the cage, like the one you can buy from a Halloween store. (If I can ever find the original image I'll post it here!) The idea was absolutely adorable so I had to recreate it at my library!

We made CAUTION/ BANNED BOOKS tape with yellow crepe streamer and the words written over it. This is taped around the cage in no rhyme or reason.
For the banners, we printed off the letters onto cardstock and taped them onto pages torn out from a discarded book. The edges of the cardstock was aged with a stamp pad. These were hung to use up the dead space up at the top of the crate.

Each book had a disclaimer attached to its jacket giving the reason why it was either banned or challenged.
Here's a link to the PDF of the book jacket covers!
We had lots of positive feedback on this display. And a good bit of people asking why these books were in a cage.
If you have access to a dog crate or any type of cage, this is definitely an attention grabbing display!
Thanks to this big lug for giving up his crate for the week!

💚💛💜
& YA book display
And & And & And & And...


Our Book List:
Anna and the French Kiss by Stephanie Perkins
Crash and Burn by Michael Hassan
Emmy and Oliver by Robin Benway
Egg and Spoon by Gregory Maguire
Eleanor and Park by Rainbow Rowell
Etiquette and Espionage by Gail Carriger
Me and Earl and the Dying Girl by Jesse Andrews
Me, Him, Them and It by Caela Carter
Nick and Norah's Infinite Playlist by Rachel Cohn and David Levithan
The Prince and the Dressmaker by Jen Wang
The Ring and The Crown by Melissa De La Cruz
The Sleeper and The Spindle by Neil Gaiman
The Steep and Thorny Way by Cat Winters
The Wicked and The Just by J. Anderson Coats
What I Saw and How I Lied by Judy Blundell
💚💛💜
DIY Journals
DIY Journals @ the library

Supplies Needed:
- Journal Pages
- Cover and Back of Journal (cardboard pieces)
- Construction paper
- Hot glue gun
- Rubber Cement
- Duct Tape
- Decorating Supplies
- Binder Clips (not required but helpful)

Journal Pages
The goal for this journal was to be very interactive and non-standard. This meant creating many different pages that included writing prompts, coloring pages and general journaling prompts. These sheets were designed beforehand using Microsoft Publisher and printed off. These were made with pictures pulled from google images and most of the fonts are from Fontmeme.com
DIY JOURNAL PAGES
DIY JOURNAL PAGES
How to make your journal
1. Choose your journal pages and put them in any order you want.

1. Choose your journal pages and put them in any order you want.

2. Choose 2 sheets of construction paper and fold in half (the fold will be towards the spine of the journal). Hot glue pages together. The paper clips help keep all the pages pressed together tightly while the glue dries.

3. While your pages are drying, decorate the Cover and Back of your journal.

4. Once the pages are dry and the cover/back are complete, align the spine evenly. Use Duct Tape to tape the book cover to the pages.

5. Use the Rubber Cement glue to attach the construction paper to the cover and the back. This also helps to reinforce everything... you know, so the whole journal isn't just being held together with duct tape...

And that's it!

This was done as a come and go craft one afternoon after school with school aged kids and it went fairly well!
If I could go back and do this differently, it would have been alot easier to have done this craft as a group, with everyone on the same step at any given time.

💚💛💜
Boys Vs. Girls SRP Bulletin Board

For a little extra challenge this summer, our bulletin board was an interactive competition between boys and girls.
Every time a reading log was turned in, participants came to the desk and placed a sticker on the current weeks section.

Here the how...
The lined paper was made on poster board. This year, our program was 7 weeks long so there were seven lines.
Each lined section had a duplicate blank piece of poster board cut out just smaller than it's section.

Can you see the duplicate sheet in this picture?
Each week, we'd have the duplicate, blank pieces sitting on the desk, attached to clipboards.
Each gender had their own clipboard so they knew which piece to put a sticker on. At the end of the week, I'd attach the newly stickered piece to the main lined poster board posted on the bulletin board.

Because I failed to get a picture of the bulletin board in its entirety, this was to the far left.
My thought was to keep track of how many books were read each week and update thermometer to reflect that.
That was a stupid idea. It was a pain and too much effort during the midst of all the summer craziness. After the first couple weeks, I started randomly raising the level just to show that we were still reading. No accurate groundwork or counting. 😬 It's not my proudest moment.

You can see part of the thermometer in this one!

💚💛💜
Incident Type


Jurassic World/ Marlin 1895SBL
I sleep better at night knowing there is an affordable option to protect myself and my family against the dinosaurs released at Lockwood Estate. Thank you Marlin Firearms for making the world a safer place, one T-Rex at a time.


💚💛💜
I Survived The Joplin Tornado, 2011

For our fourth "I Survived" book club meeting we talked about the Joplin Tornado. This program was broken down into 3 parts: Book discussion, snacks and an activity.
Discussion
Discussion
Of all the discussions we've had this was the most involved. Our library isn't located in Tornado Alley, but tornadoes aren't all that uncommon where we live so most of the group were familiar with these storms.
As always, at the beginning of our discussion we each picked a favorite part of the book and shared it with the group. Other topics points we hit were how tornadoes form, their features, the destruction
 they cause and tornado safety. Aside from general tornadoes, of course we talked about the Joplin tornado.
One of the grandmothers in our group even had a boss who had grown up in Joplin and she shared a bit of his family's experience!
If you remember from the story, Dex's parents were at a graduation for the local high school students when the tornado hit. The graduation wasn't held at the high school but instead at the Leggett and Platt arena on Missouri Southern State University campus and was actually used as an emergency shelter in real life. For some reason, the minor fact involving Dex's parents to have foundations in truth caught my attention. From Graduation to Terror and JHS Class of 2011 Reflects On Graduation, Future were two memorable articles I read.
Emergency Kit Relay Activity
Instead of a craft (and because the only good themed craft I could find was Tornado in a Bottle, which I did NOT want to do) we played a relay game!
 Emergency Kits are so important to have and in this game, teams are building their own kits to prepare themselves against future disasters in a relay style game.
During our discussion we made sure to talk about Emergency Kits briefly!
Cards with images representing various items were printed off and spread across a table face up. Most of the items were very useful to a traumatic event and some of them weren't.
HOW TO PLAY
As always, at the beginning of our discussion we each picked a favorite part of the book and shared it with the group. Other topics points we hit were how tornadoes form, their features, the destruction

One of the grandmothers in our group even had a boss who had grown up in Joplin and she shared a bit of his family's experience!
If you remember from the story, Dex's parents were at a graduation for the local high school students when the tornado hit. The graduation wasn't held at the high school but instead at the Leggett and Platt arena on Missouri Southern State University campus and was actually used as an emergency shelter in real life. For some reason, the minor fact involving Dex's parents to have foundations in truth caught my attention. From Graduation to Terror and JHS Class of 2011 Reflects On Graduation, Future were two memorable articles I read.
Emergency Kit Relay Activity
Instead of a craft (and because the only good themed craft I could find was Tornado in a Bottle, which I did NOT want to do) we played a relay game!

During our discussion we made sure to talk about Emergency Kits briefly!
Cards with images representing various items were printed off and spread across a table face up. Most of the items were very useful to a traumatic event and some of them weren't.
HOW TO PLAY
Divide into 2 or 3 teams - we did Boys vs Girls with about 7 on each team.
The way our room was set up was we had a table on one end where all the Item Cards were spread out face up and players stood at the other end of the room.
Each team had to stand single file behind a chair which marked as their boundary limit. No one could go past that chair until a member of their team had returned with an Item Card. Teams placed their Item Card on the seat of the chair once they came back.
This continued on relay-style until all the Item Cards were chosen.
Each item had been given a point value so to choose the winning team, groups tallied up their score while I gave each point value out loud.
Here's a link to the Item Cards and the Point Value Sheet I made. Feel free to use them! The pictures for the Item Cards are straight off Google Images so one or two have watermarks... 😣
Graph Map Activity
This is an activity that we didn't have time to do but I'll share it with you anyway! This activity is about reaching safety using an X,Y grid and directions.

In the Lauren Tarshis's books, having a sense of direction is very crucial to survival. In I Survived: The Joplin Tornado, Dex has to find his way from Peter's Garage to his home. That would be HARD when all the landmarks you've ever known were gone.
One of the themes of this series is getting away from danger and in an emergency, we might have to rely on how to read a map to get us out of a dangerous situation.
This Graph Map Activity was inspired by the Disaster Route Lesson on Stem Read which is a very handy little website.
In this activity we would discuss cardinal direction, compass rose and use directions to travel across an X,Y grid to safety.

Because this map had schools distinctively marked on the map, those were able to be transferred onto our Map Activity Sheet.
My goal was, using the graph map to travel from one of the schools in the tornado's path to the safe school. The thought was we could do one as a group and then form teams of two and each person could take turns giving each other directions.
***
💚💛💜
Subscribe to:
Posts
(
Atom
)
About Me
Hello! My name is Anna and welcome to my blog. I enjoy reading, crafting, and the like. I'm always looking for new crafting ideas and since I'm continuously taken to other peoples blogs, I thought "why not make my own?"


