Cardboard Rocketship


Alabama's Summer Reading Theme this year was "Alabama has a universe of stories". As part of our room decoration, we made a giant rocketship for kids to play and/or read in.

This was made out of a Dryer box from Lowes. Here are some pictures of how it was constructed.

 To get height, the top folds of the box were stood and taped up.

A roof added more height as well.

All seams were reinforced inside the rocket with strips of cardboard and hot glue.


Here's a better picture of the four triangles used for the roof.

After this, I cut out a hole for the window on the front, and an arching doorway on the side.


Getting crisp edges and keeping smooth sides while wrapping it with bulletin board paper was surprisingly difficult.

Wings were added after it was covered.

If you look inside the ship in this picture, you can see where the left wing is attached.

To make the wings as sturdy as I could, I cut 8 inch strips of cardboard and thread them through the rocket ship. One side was hot glued to the wing and the other was folded along glued inside the ship.

There was some flexibility to the wings, but they stood relatively sturdy for the most part..... (until about 2 weeks into the summer....)


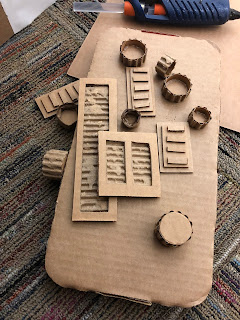
Gadgets for the interior.

An insiders view.
Final product.

Doorway and window were reinforced with more cardboard.

I had intended to add more embellishment to the outside and inside, but summer crept up too fast this year and I ran out of time!


💚💛💜

The Good Dinosaur Movie Night

The Good Dinosaur Movie Night

 For our Summer Reading Program, we typically have 2 movie nights at the library. These are held after hours and only attendees are allowed in the building. We have snacks, crafts, activities and project the movie on one of the big walls for everyone to see. Movie nights at the library are one of my favorite programs we have.

In this post, I'm sharing our DINO DIG activity, DINO BONES craft, PASSIVE PROGRAM and little SNACK idea.

Dino Dig
Inspiration for this craft came from a recipe for "Dinosaur Eggs" from Super Simple Fossil Projects by Jessie Alkire. In this book, there are instructions on how to make Dinosaur Eggs with small plastic
toy dinos inside them. Initially, we discussed having the kids create and mold their own dinosaur egg to take home and dry. They could then crack open their egg later to reveal their dinosaur. The drying process would take a few days though, so we adapted the craft to something similar.

Our dino dig used a similar dirt recipe as the book and we encased the dinosaurs inside and let the kids dig for their dino!

Once they dug out their dinosaur, we had a cleaning station to wipe all the dirt and mess off so they could truly see and identify their dino.

Preparation Process
Recipe came from Projects for Preschoolers. The one thing I would have done differently is letting the mixture dry longer. I prepared this 3 days ahead of time to dry but it could have used more. If you're not using a large container like I did, 3 days would probably be fine.

We filled up 2 of these plastic storage bins with our dirt mixture and dinosaurs and left them outside to dry during the day and brought them inside the building during the night.

 
We had right around 40 of these guys to hide.

Dinosaurs were bought from the local dollar store and tried to get a wide variety of types.

Before burying, I snapped this picture  so I could make an identification chart with all the different types they might find.

Thankfully I was able to find a chart already made with exactly what I needed.

As kids dug up and identified their dinosaur, they could write their name under "Paleontologist" and the type dinosaur they found under "Type of Dinosaur"

And that was it.


Dinosaur Bone Art

This was another activity from the Super Simple Fossil Projects book by Jessie Alkire.

This was alot less mess than the Dino Dig but still a good bit of set-up.

For this activity, kids are coloring in a dinosaur with water color paint. Their bones have been laid out with masking tape and when the paint dries, the masking tape can be pulled up to reveal their skeleton!


Snacks

We always have popcorn at Movie Night, but we also prepared a little sweet snack to go along with this event!  ....   Pinterest always has a plethora of snack mix ideas!


Passive Program
To foster a little excitement for our Movie Night, we had these footprints printed out and set out on a table with crayons.

Kids would write something they were proud of and we'd stick it to the front of the desk.

We had some darling responses and I wish I had a picture of them! My two favorites were someone was proud of being a  cleft palate kid and another was proud of their mom sticking to her diet! 😃

Click Here for Printable Arlo Footprints

Click Here for Table Top Signs and Dinosaur Identification Chart


💚💛💜 


I Survived the Sinking of the Titanic, 1912

I Survived the Sinking of the Titanic, 1912


 Yall. Hands down, this is the best book in the series! ... However, this was also the meeting where I forgot to take pictures...😞 So bear with me. This is going to be short and sweet.

SNACK
I always try to have a themed snack in book club and this month it was lemon cookies. If you recall, George's sister Phoebe carried lemon drops around in a tin can and when she ventured into the baggage hold, she had left a trail of lemon drop cookies behind her. 

We had Nilla Lemon Wafer Cookies and Archway Frosty Lemon Cookies.

ACTIVITY

For our activity, we had a team-based trivia inspired relay race. 

Objective: The objective of this race was to earn points for your team by correctly answering the trivia question. You earned points by racing to the chair with the highest point value. (See my professional design plan? ⇨)

Points: Each chair had a different point value which was written on a sign and taped to the wall.

Set Up: I had a list of 20 trivia questions and each team got an exact same set of 20 answer cards. The answer cards already had the correct answers on them. When I asked a trivia question, it was their job to sort through their cards, find the one with the correct answer and race to a chair.

If you answered the trivia question correctly, your team earned those chairs points. If your team answered the question incorrectly, your team lost those chair points. 

Strategy: Teams that weren't confident their answer was correct would choose a chair with the lowest point value. That way, if it was wrong, their team might only lose 20 points compared to 50 points. 

You can see the answer cards in the picture below. The different colors differentiate the different teams.

Questions and Answer Card PDFs are posted below!

Remember those activity sheets in school where you have to draw the line from the question to the correct answer on the opposite side of the page? This game is similar to that, only with more competition and excitement.

One thing I would have done differently would be to have lower point values. I used 20, 30, 40 & 50 which turned out to be a little tricky for some of our younger groups to solve when it came to adding and subtracting those points.

Teams kept track of their own points throughout the game. 

HANDS ON
You can't have a Titanic book club without making an iceberg. Right?

This is one of the things I forgot to take a picture of, but to make my iceberg, I just filled a large bucket with water and stuck it inside the freezer for a few days. If you've made ice cubes, you don't need me to explain this though 😉

The group loved seeing who could hold their hands on the ice the longest.

ALL IN ALL

This was probably one of our best discussions since I Survived the Joplin Tornado. Everything about this book, our discussion, the game, all of it was engaging.

CLICK HERE for Titanic Relay Questions
CLICK HERE for Titanic Relay Answer Cards